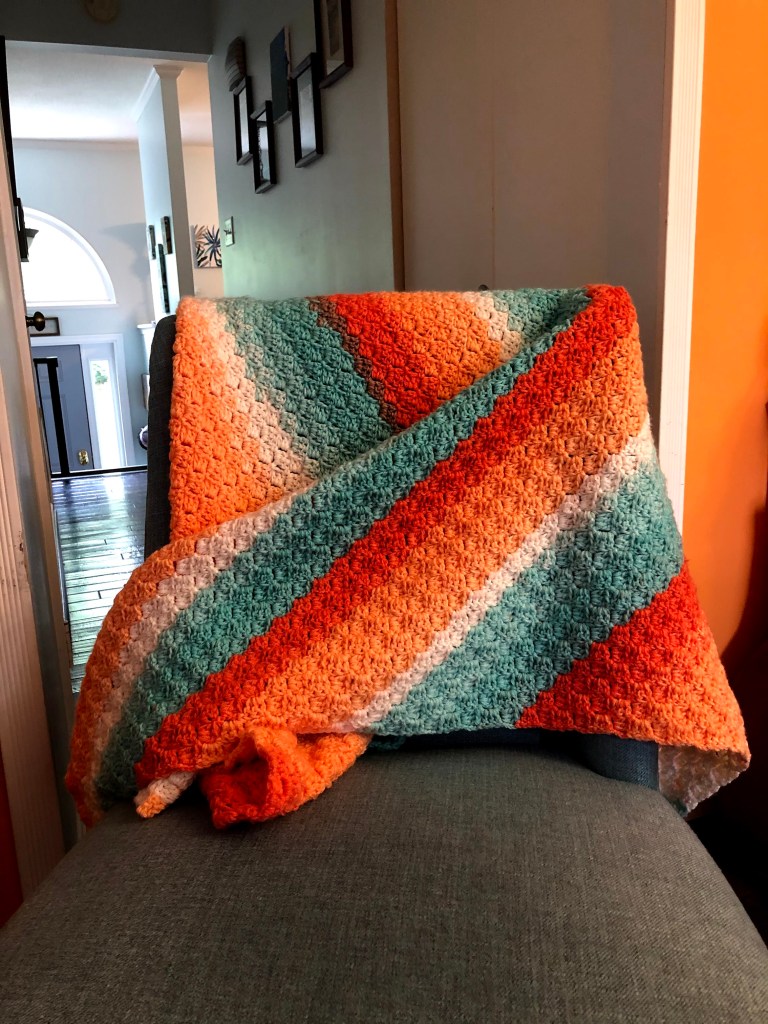
As of this morning, I officially have NO active projects. Old WIPS don’t count, by the way. I finished my C2C blanket for a friend, and it looks AWESOME! The only thing left to do is wash it and mail it! Since learning the C2C technique back in April, this is my 3rd throw/blanket. It was really fun; this will definitely not be my last!
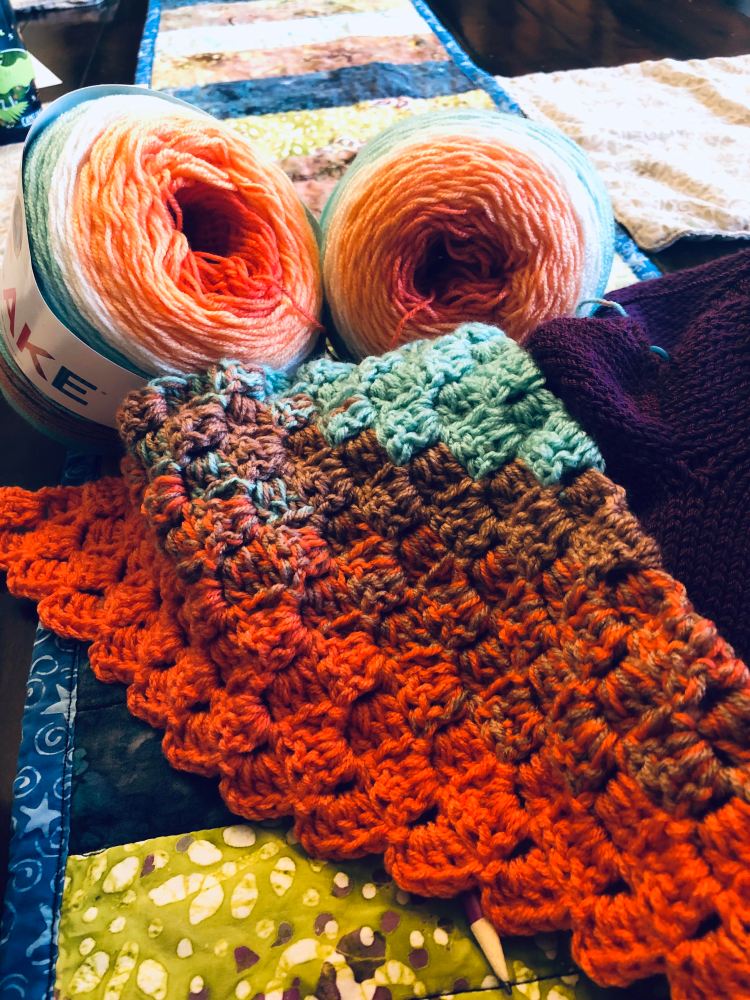
As stated above, I don’t really consider this an official pattern. More of a guide to how I worked this project. I used the yarn (DK weight) held double and a larger hook than recommended (6.0 mm) on the ballband. I included the amount of increases, straight rows, and decrease rows; literally to take the guess work out of this project for you. I had 0.8 oz , about 89 yards remaining from each ball. Your yarn mileage may vary from mine depending on how you crochet.
How I Made My C2C Throw (not a real pattern):
8 balls of Lion Brand Cupcake Yarn in Sea Breeze (approx 4720 yards total)
Size J hook (6.0mm)
Other Notions: Yarn Needle to weave in ends.
Optional Notions:Stitch Markers to keep track of rows.
Dimensions: 45×57
WITH YARN HELD DOUBLE (throughout the entire project)
55 rows of C2C increase
17 rows no increase or decrease
55 rows of C2C decrease.
Weave in all ends. I recommend washing before use, big pieces like this get unwieldy and tend to pick up detritus.
Don’t know how to do C2C? No worries, I got you covered:
This is my favorite C2C tutorial: Winding Road Crochet
It has text, pictures, charts, AND videos. It also has left-handed directions!
Be advised, there is a LOT of information, and not necessarily in the order you will need it in for this throw. I think its increase, decrease, “straight” (no increase or decrease)
This site also has instructions on how to put on a border- I thought my blanket looked fine without the border (as did my spouse). You may have different opinions for yours. A border will require additional yarn!

2 responses to “Free (Not A)Pattern: C2C Cupcake Throw”
It didn’t really show how to do the no increase no decrease rows. How do you do that?
LikeLike
Good question. What you will be doing is adding length, not additional width. Think about the decrease side, it’s straight, working toward the center. And eventually they meet in the middle.
When you do straight sections of C2C, one side you will work like the decrease, the other side like the increase. Make sure you continue to do all your increases on the same side and all the decreases on the same side.
To be honest, I wasn’t sure if it was going to work until I was about 6 rows into the straight section.
I hope this helps. Let me know if you’re still stuck.
LikeLike